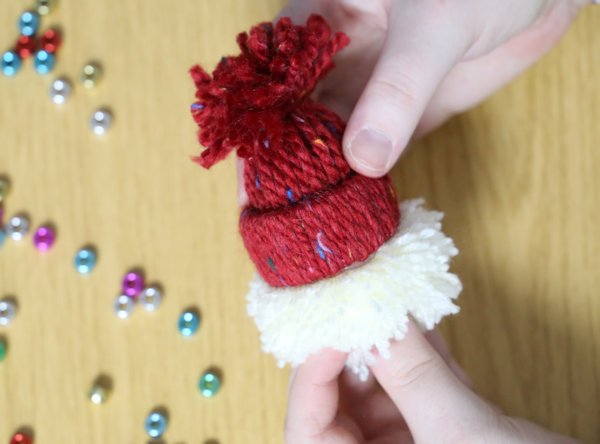
How to Make Your Own Festive Pom-Pom Gonk
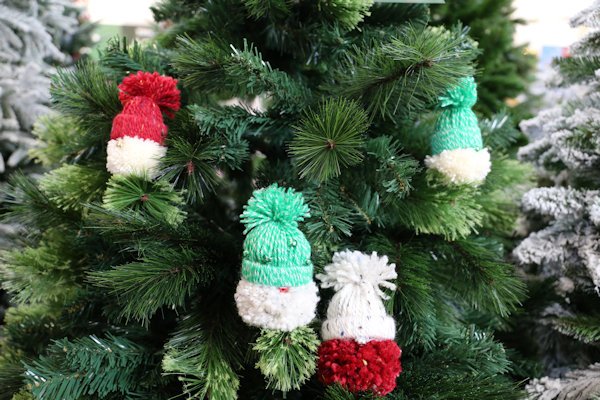
As Christmas approaches, it’s the perfect time for some festive crafts! Making your own decorations, such as these cheerful pom-pom gonks, is a fantastic way to get creative and even make a unique gift for a loved one.
This particular style of craft has many uses and can be fully customised to your own style through colours of wool or extra decorations. You can even turn your pom-poms or gonks into hanging baubles, or connect your gonks with string to form a gonk garland (gonkland?)
These gonks are a great craft for both children and adults, though we would recommend adult supervision at all times due to the use of scissors and hot glue.
Why not give these fun little guys a friend and check out our range of Christmas decorations at Longacres, online here.
You will need:

A piece of card – 20cm x 20cm (an old parcel or cereal box works great)
Scissors
Pen or pencil
Cup
A bottle cap
2 or more different coloured balls of wool
Toilet roll tubes
Ruler
Hot glue gun and spare glue sticks
Beads
Tissue, cotton balls or toy stuffing
How to make a pom-pom for the gonks body
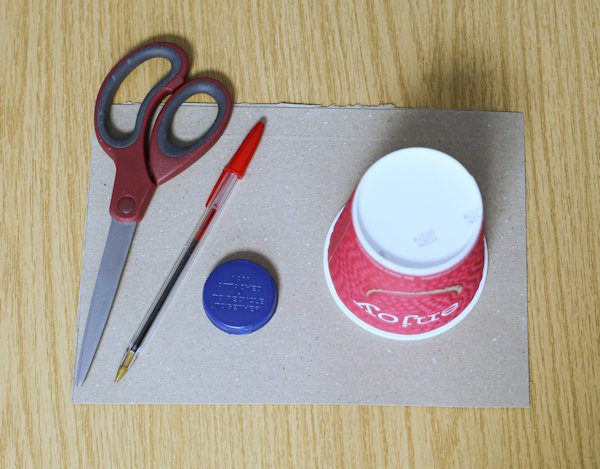
 Step 1 – Draw a circle using your cup as a template.
Step 2 – Take the bottle cap and use it as a template to draw a smaller circle in the centre of the large circle. You should end up with a shape that resembles a donut.
Step 3 – Using a pair of scissors, carefully cut out the large circle first, followed by the inner circle. Cut a slit between the outer circle and inner circle to make it easier and aid in the next steps.
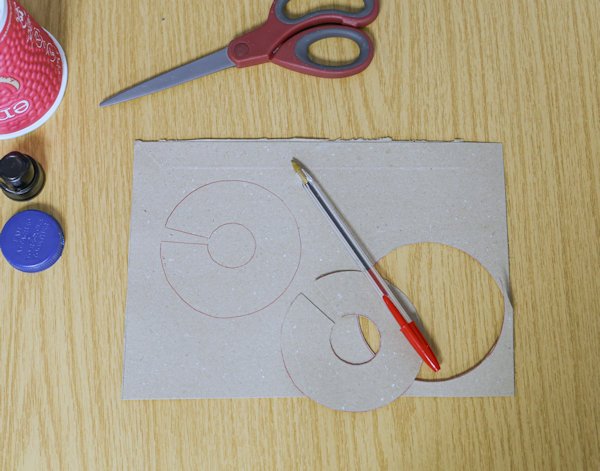
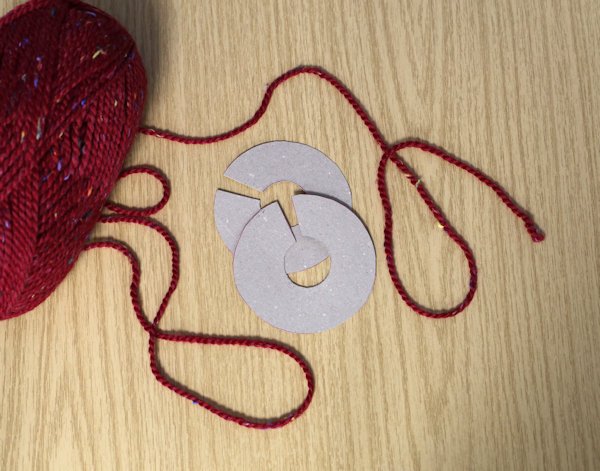
Top tip – When cutting your slit, we would recommend making it roughly 3 millimetres wide as this will act as the opening to thread your wool. You should end up with a piece of card resembling a ‘C’ shape once done.
Step 4 – Take the piece of card you have just cut out, trace around it on the remaining card and cut it out, to create a second identical piece.
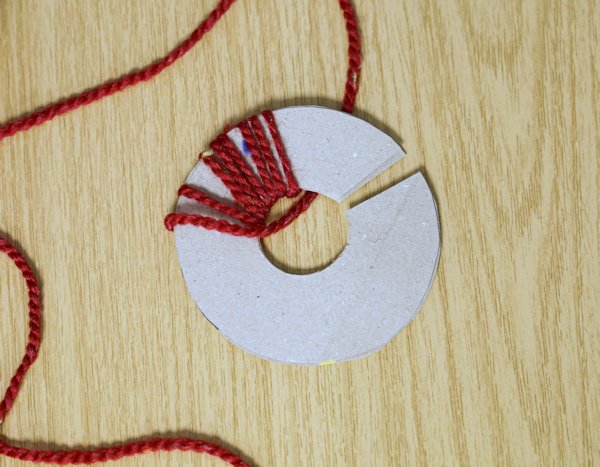

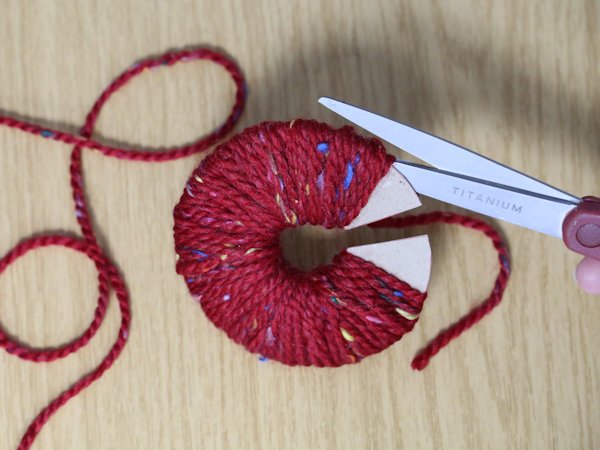
Step 6 – Using the slit you created earlier, begin to wrap your wool around the card in circular motions. You will want to continue wrapping until it is 4 or 5 layers thick and you can no longer see the card under the wool.
Step 7 – Tie off your wool using a knot and trim the excess.

Step 9 – Starting from one side, begin to cut through the top of the wool until you have cut all the way around from one edge to the other. It should start to form a ball shape, though be careful to not allow any pieces to fall out.
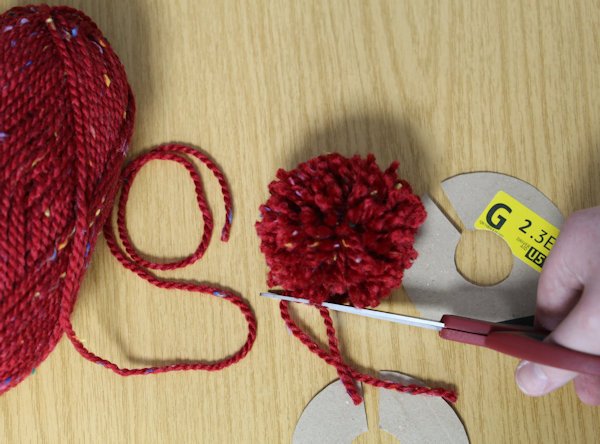
 Step 10 – Cut a new piece of wool, roughly 15cm long, and slide this between the pieces of card and around the ball. Pull the string together tightly and secure it with a knot.
Step 11- Cut away any long pieces of string, and tidy up any edges that stick out. You can roll the pom-pom in your hands to give it a fluffy and round appearance.
How to make a hat for your gonk
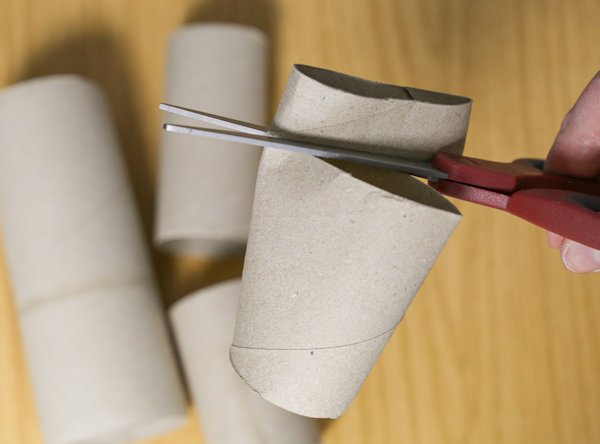
Step 12 - Take a toilet roll tube and cut a strip approximately 1cm wide and put it to the side.
Step 13 – Take a new colour wool and cut 40 pieces, roughly 30cm long. The easiest way to do this is to wrap the wool around the length of a ruler 20 times and then cut the ends.
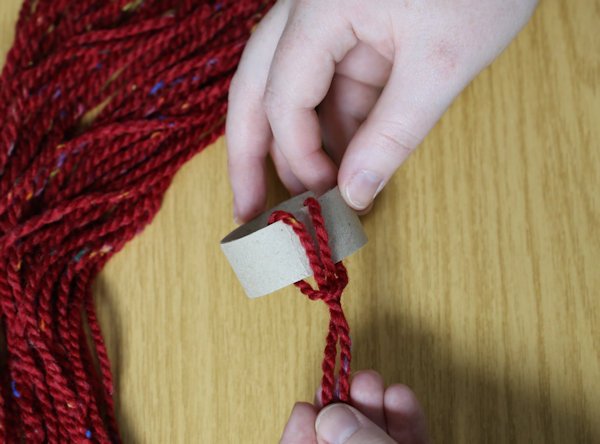
 Step 14 – Take one length of wool folded in half and pass it through the middle of the toilet roll tube you’ve cut. Take both ends of the string, fold them back over the outside of the tube and through the loop at the other side to secure it in place.
Step 15 – Repeat this all the way around the tube until it is fully covered. You may not need to use all of your pieces of wool.
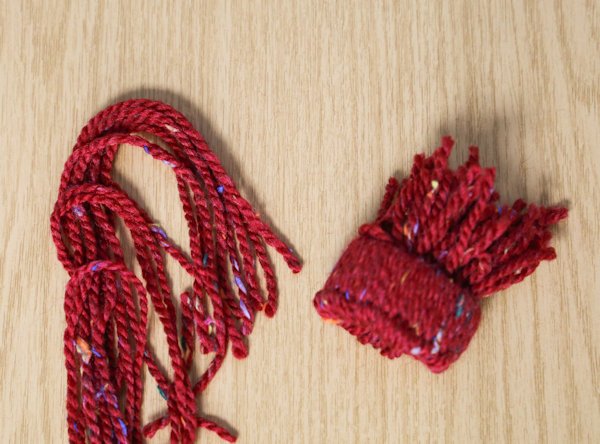
 Step 16 – Take the ends of the wool, push them all through the tube and out the other side.
Top tip – You can string extra beads on to the strands of wool for an extra decoration on your wool hat!
Step 17 – Gather the ends together and secure them tightly with a piece of matching wool an inch from the end. You can trim any excess and long pieces so the top has a uniform, fluffy look.
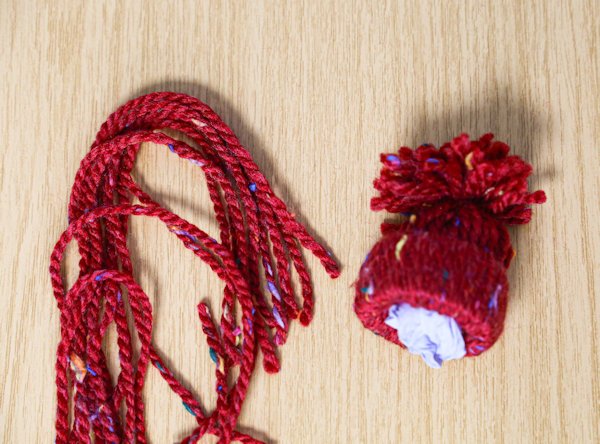

Step 19 – With a hot glue gun, carefully line the bottom of the hat with glue and secure it to the pom-pom body. We recommend pressing firmly and holding it in place for up to 30 seconds for the glue to dry.

Top tip - If you want to go a step further, you could even glue some decorations of your choice around the hat, such as stars for an extra sparkle!
These delightful festive gonks can be made over and over, by simply repeating the steps. You can also change up their size to make a family of gonks; the bigger the cup you trace during step 1, then the bigger your pom-pom will be. The same can be said with the toilet roll tube you use; using a kitchen paper tube will make a bigger hat too!
Love these gonks and looking for some more? Check out our range of gonks at Longacres, online here.
You can find everything you need for this craft in our crafting department in store! If you enjoyed this craft, check out our guide on how to make your own full size Christmas gonk.
