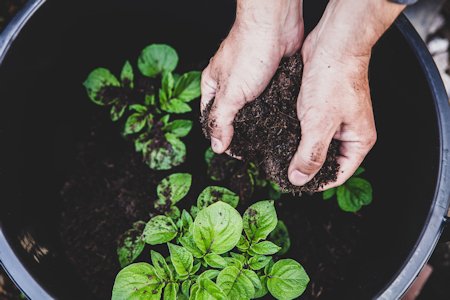
How To Grow Your Own Winter Potatoes
Whether you are a frequent gardener or complete novice, growing your own potatoes from home is a fantastic way to get into the garden and try your hand at something new. These versatile vegetables are an uncomplicated way to start your growing journey; all you need is a container, soil and seed potatoes (plus a little bit of patience). No matter how many times you have grown your own, there is no better feeling than harvesting the produce of your hard work.
Winter seed potatoes are a popular choice for growers, as they don’t need to planted until later in the year compared to other crops. Grown from cold-stored potato tubers, this crop will be ready to harvest throughout winter; perfect for Christmas!
 Popular varieties of winter seed potatoes include:
Charlotte - a popular salad potato, best when boiled or roasted. Small in size and full of flavour.
Foremost – short, oval potatoes with a waxy skin. Great for salads or roasting.
Maris Peer - great for growing in containers with a small, uniform size. Subtle flavour, great for boiling, steaming or roasting whole.
Pentland Javelin – a good choice for first time growers due to their disease resistance. Short and oval in shape, great for roasting and boiling.
Red Duke of York – the perfect all-rounder potato for roasting, boiling, mashing or making chips. Fantastic flavour and a popular choice for growers.
When to plant winter potatoes
Planting outdoors – you can plant seed potatoes outdoors in July to allow them to form tubers before any frosts begin. They will be ready to harvest early winter. They are best when sheltered from harsh weather with a cloche or in a protected area of your garden.
Planting indoors – you can plant seed potatoes in a greenhouse or cool conservatory throughout August to early September, which will be ready to harvest at Christmas.
How to plant winter potatoes
 Growing in the ground
Dig a trench roughly 15cm deep and place the seed potatoes, shoots upwards, with a 30cm spacing between each one.
Fill the trench with soil until the ground is level on the surface.
As shoots begin to appear above the soil, cover with more soil to create a mound across the line of potatoes known as ‘earthing up’.
Continue this until the shoots reach roughly 20cm in height, and ensure there are no potatoes growing too close to the surface and showing through the soil. If any start to appear, simply cover them over with a thick layer of soil.
Make sure the potatoes stay well-watered throughout their growth, and replace any soil that may get washed down from the mound while watering.
Once the foliage growing above the surface of the soil has flowered and begins to turn brown (after approximately 12 weeks) your potatoes will be ready to harvest.
You can cut back the exposed foliage and leave the potatoes in the ground until you are ready to eat them. It is advised that all the potatoes are harvested before any hard frosts set in.
Growing in containers

Fill your container with a layer of soil roughly 15cm deep and place your seed potatoes, shoots facing upwards, on the surface. Ensure there is a 15-30cm space between each potato.
Cover the seed potatoes with a layer of soil until they are not visible any more.
Place your container in a sheltered location, such as under the protection of trees or on a patio.
Continue to cover new shoots with soil until the container is completely full or the shoots have reached roughly 20cm tall.
Water your potatoes daily to ensure the soil stays moist, and allow any excess water to drain away.
Once the foliage has flowered and begins to go brown (after approximately 12 weeks) you can begin to harvest your crop.


 Popular varieties of winter seed potatoes include:


